
What matters (and what you can safely ignore)
If your goal is clear—keep food fresh longer and avoid freezer burn—focus on three things: proper bag choice, portioning, and correct sealing technique for the food's moisture level. You can mostly ignore brand hype, flashy extra modes you won't use, and marketing claims about “indefinite” freshness—vacuum sealing slows spoilage and oxidation but doesn’t sterilize food or replace refrigeration and safe handling.
End result: what a successful vacuum-sealed package looks like
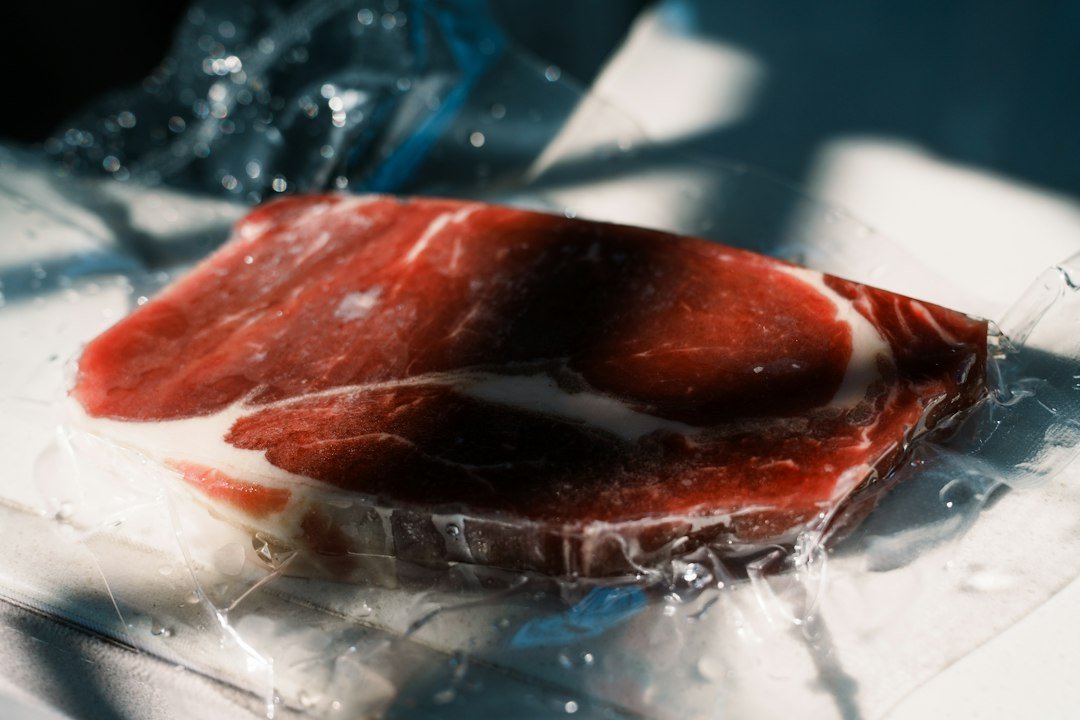
A good vacuum-sealed package is fully collapsed around the food with no trapped air pockets, a clean uninterrupted seal across the bag mouth, labeled with date and contents, and stored in the right environment (fridge for short-term, freezer for longer). Meats should show no ice crystals after freezing and vegetables should retain color and texture when blanched before sealing for long storage.
What you'll need before you start
- Vacuum sealer (countertop or handheld) and compatible bags or rolls.
- Sharp knife or kitchen shears, cutting board, and labels/marker.
- For vegetables: a pot for blanching and an ice bath.
- A tray for organizing portions and a clean surface for sealing.
Step-by-step: set up, portion, and seal
Follow this order for a reliable workflow that minimizes mistakes.
1. Set up the machine and bags
Unpack and place the vacuum sealer on a flat, dry surface. Plug it in and make sure any removable drip tray or gasket is clean. Use only bags rated for vacuum sealing—impulse-seal bags or compatible rolls. If using a roll, cut a length that leaves 2–3 inches of extra material beyond the bag content for a reliable seal.
2. Portion food for easy use
Portion by meal-size or recipe amount. Overfilling a bag prevents a proper seal and under-portioning wastes freezer space. For meats, divide into 1–2 serving pieces if you'll defrost and cook individually. For bulk items like berries or sliced cheese, arrange in single-layer trays before sealing to prevent clumping.
3. Remove surface moisture or pre-freeze wet foods
For moist items (marinated meat, cut fruit, wet cheese), lightly pat dry with paper towels. If the food is very wet, freeze it on a tray for 30–60 minutes so it firms up; that prevents liquid from being sucked into the sealer's channel and interfering with the seal.
4. Choose the right sealing mode
Many machines have Dry and Moist settings. Use Dry for breads, crackers, and dry goods; Moist for fresh meats and vegetables that retain some juice. If your model has a “gentle” or “pulse” mode, use it for delicate items like berries or flaky fish to avoid crushing.
5. Position and seal
Place the open end of the bag across the sealing strip, making sure no wrinkles or food fragments sit in the seal area. Close the lid and start the vacuum cycle per your model's instructions. Wait until the machine completes both vacuuming and sealing before opening. Double-seal if you want extra security: run a second seal 1/4" above the first.
Freezing, labeling and storage tips
For freezer storage, remove as much air as possible and lay packages flat until fully frozen—this saves space and prevents deformation. Label each package with contents and date; a simple “chicken breast — 2026-10-01” will save guesswork. Use a first-in, first-out routine: older packages at the front of the freezer.
Special cases and small adaptations
Soups, stews and liquids
Cool liquids to near room temperature and then pre-freeze in a shallow container until slushy before vacuum sealing. Alternatively, use the machine’s “seal only” function on a rigid bag after removing most air by hand—the goal is to prevent liquid from reaching the pump.
Berries, bread and delicate items
Freeze berries on a tray first to avoid crushing. For bread, use “gentle” mode or wrap in parchment inside the bag to keep slices from being flattened. For leafy greens, blanch before sealing to preserve texture.
Sous vide cooking
Vacuum-sealed pouches work well for sous vide—but select bags labeled for heat use and ensure seals are flawless. If the sealer offers adjustable vacuum strength, reduce suction for delicate proteins to keep texture intact.
Troubleshooting common problems
Seal is weak, wrinkled or incomplete
Cause: bag mouth not flat, crumbs or moisture in seal area, worn sealing strip. Fix: trim the bag end and reseal on a clean area; clean the sealing strip; replace the gasket or Teflon strip per the manual.
Machine won’t start vacuuming
Cause: lid not fully closed, bag not positioned correctly, power supply issue. Fix: reposition the bag, close the lid firmly and check the power. On models with a locking latch, ensure it’s engaged.
Liquid pulled into the machine
Cause: overly wet food not pre-frozen. Fix: unplug and clean the drip tray and sealing chamber; pre-freeze liquids or use “seal only” method and hand-extract excess air first.
When vacuum sealing doesn't extend life
Vacuum sealing slows oxidation and limits freezer burn, but it won't stop enzymatic changes (e.g., browning in some fruits) or kill bacteria. Always refrigerate perishables promptly, observe recommended storage times (e.g., vacuum-sealed raw meat in freezer: 1–3 years for best quality depending on cut), and use safe thawing methods—preferably in the fridge or sous vide for cooking directly.
When to consider upgrading or buying one
Buy or upgrade when you regularly batch-cook, buy meat in bulk, preserve seasonal produce, or sous vide. For home cooks who need a reliable, full-featured model, the Mesliese 90kPa Vacuum Sealer (ID 2938) is a strong general-purpose option that balances suction with helpful modes for moist and dry foods.
- Choose FDA-safe vacuum bags or roll and cut with 2–3 inches extra.
- Portion food into meal-sized packages before sealing.
- Pre-freeze wet foods or use Moist/Gentle mode to protect seals.
- Label each bag with contents and date immediately after sealing.
- Lay bags flat to freeze for space efficiency and faster freezing.
- Clean the sealer’s drip tray and seal strip after sealing wet items.
Use the right bags, portion sizes and sealing mode; avoid liquid in the sealing channel by pre-freezing or using seal-only techniques; and label and store packages correctly. A reliable vacuum sealer can cut waste and keep food fresher—but it complements, not replaces, proper refrigeration and food safety practices.
How long does vacuum sealing extend food life?
Vacuum sealing typically doubles or triples refrigerator life for many foods and significantly reduces freezer burn, letting frozen meat keep quality for 1–3 years depending on the cut and storage conditions.
Can I vacuum seal raw meat and keep it in the fridge?
Yes—raw meat can be vacuum-sealed and refrigerated for several days longer than unpackaged meat; use within 3–5 days for ground meat and 5–7 days for whole cuts, or freeze for long-term storage.
Are reusable vacuum bags safe?
Many reusable bags are safe and convenient—check manufacturer guidance for heat tolerance, washing instructions, and whether they are recommended for freezing or sous vide use.
Can vacuum sealing prevent freezer burn completely?
Vacuum sealing greatly reduces freezer burn by removing air, but it doesn't completely eliminate it if package integrity is compromised or storage temperatures fluctuate.
How do I clean my vacuum sealer after sealing liquids?
Unplug the machine, remove and wash the drip tray and any removable parts, wipe the sealing strip with a damp cloth, and let components dry before reassembly to prevent odor and mold.